Thursday, April 7, 2011

Treasures of Yesterday


Would you like to make this project? Here is how to do it:

Finished Card Size: 12”x12”

Materials Used:

· Ivory Cardstock 12”x 12” (x2), 6”x12”(x2)

· Maroon Cardstock 11½”x11½” (x2), 6”x12”

· Mauve Cardstock 6¼”x4¼”, 4¼”x 4¾”

· Tan Cardstock 6¼”x4¼”

· Beige Cardstock 6¼”x4¼”, 4¼”x 4¾”

· Ivory Sheer Ribbon ⅞” Wide

· Heartfelt Creations Stamps Posy Patch Flowers Product ID: HCPC 3303

· Heartfelt Creations Die Cuts Posy Patch Product ID: HCD 701

· Heartfelt Creations Die Cuts Perfect Petals Product ID: HCD 704

· Spellbinders Fancy Tags

· Copic Markers: R85, RV34, R39, RV11

· Martha Stewart Microbeads White Gold

· Dress it Up Buttons Au Jardin

· Cricut Machine

· Art Glitter Glue

· Sizzix Die Cut Machine

· Foam Dots

· Small Zots

· Zig 2-Way Glue Pen

· (3) 4”x6” Pictures

Directions:

· Cut 2 sheets of maroon cardstock to 11½”x 11½” and add to centers of 12”x12” ivory cardstock

· Cut a mat in mauve and beige cardstock at 6¼”x 4¼”

· Mat each picture with a colored mat (female in mauve, male in beige)

· Using zots add a piece of sheer beige ribbon to maroon/ivory cardstock base (Scrapbook Page 1) and placing matted pictures on top of attached ribbon allowing a little bit of looping next to pictures

· Add a small bow to end of ribbon and add a button to center of bow

· Cut a title for layout on Cricut Machine in Script MT Bold at 1.5 inches (Ivory for Shadow Blackout layer and Maroon for Normal layer)

· Glue title layers together and glue on to (Scrapbook Page 1)

· Cut a mat mauve and beige mat at 4¼”x 4¾”

· Add these mats to the edge of tan matted picture and add sheer ribbon and apply to center of maroon/ivory cardstock base (Scrapbook Layout Page 2)

· Add button to center of bow on picture

· Use corner flourish from Heartfelt Creations Die Cuts Perfect Petals with Sizzix Die Cut Machine and cut out 4 corners out of ivory cardstock (6”x12”) and attach to 4 corners (Scrapbook Layout Page 1)

· Use the fancy tag with a scrap of ivory cardstock and Sizzix Die Cut Machine and hand wrote the wedding date and attached to page(Scrapbook Layout Page 1) centered under pictures

· Stamp various size Posy Patch Flowers on scrap of ivory cardstock and colored with various colors of Copic markers and then used the Posy Patch Die cuts and Sizzix Die Cuts

· Added Art Glitter glue and Martha Stewart Microbeads White Gold to the center of the Posy Flowers

· Added the flowers and buttons around the matted pictures on both pages with foam dots


Welcome to the World


Finished Card Size: 6”x4 ⅝”

Materials Used:

· White Cardstock 6”x 9¼, 3½”x 3¼”, 1½”x 2”

· Light Blue Cardstock 5⅞”x 4½”, 3⅜”x 3⅝”, 2½”x 2⅞”

· Paper Studio Tonal Blue Gingham Cardstock 5¾”x 4⅜”, 2”x 2¼”

· Heartfelt Creations Stamp Baby Quilt Blocks Product ID: HCPC 662

· Fiskars Clear Stamps-Baby

· Memento Ink Pad Tuxedo Black

· Copic Markers: B000, B02, E31, E33, Y11, R83, G12, 0

· Silver Tone Baby Shoe Charm

· Light Blue Satin Ribbon ¼” Wide

Directions:

· Score white cardstock (6”x 9¼”) at 4⅝” to form card base

· Attach blue gingham cardstock (5¾”x 4⅜”) to light blue cardstock (5⅞”x 4½”)

· Attach light blue satin ribbon to 2 corners of the layered mats and attach to the card base

· Stamp Baby Quilt Blocks with Tuxedo Black inkpad on white cardstock (3½”x 3¼”)

· Color the stamped image with the Copic markers

· Mat the stamped image on the light blue cardstock (3⅜”x 3⅝”)

· Attached the matted stamped image to the card base

· Add bow to ribbon and add baby shoe charm to the bow

· Stamp the Welcome to the World sentiment on white cardstock (1½”x 2”) with Tuxedo Black inkpad

· Mat the stamped image to blue gingham cardstock (2”x 2¼”) and then mat on light blue cardstock (2 ½”x 2⅞”) and attach to the inside of the card base

Flower in My Garden


Finished Card Size: 6”x4⅝”

Materials Used:

· White Cardstock 6”x9 ¼”,3 ¾”x2” (x2)

· Core`dinations Gemstone Pink Diamond 5⅞”x4 ½”, 4”x 2 ¼” (x2), 3 ⅝”x 1 ½”

· Colorbok Pattern Pack Pastels Cardstock 5 ¾”x4⅜”, 1 ⅜x 3 ½”

· Heartfelt Creations Stamp Daisy Patch Swirl Product ID: HCPC 3324

· Heartfelt Creations Stamp Daisy Patch Flowers Product ID: HCPC 3318

· Heartfelt Creations Die Cut Daisy Patch Product ID: HCD 703

· Memento Ink Pad Tuxedo Black

· Copic Markers: G21, G24, RV93, RV00, RV34

· Liquid Pearls Petal Pink

· Light Pink Satin Ribbon ⅛” Wide

· Hot Pink Satin Ribbon ⅛” Wide

· Small White Pearls by the Yard

· Gala Glitz Mauvie

· Art Glitter Glue

· Sizzix Die Cut Machine

· Small Zots

Directions:

· Score white cardstock 6”x 9¼” at 4⅝” to form card base

· Attach pink print cardstock (5 ¾”x 4⅜”) to pink diamond cardstock (5⅞”x4½”)

· Attach light pink satin ribbon to layered mats and attach to the card base

· Stamp Daisy Patch Swirls with Tuxedo Black inkpad on white cardstock (3¾”x2”)

· Color the stamped image with the Copic markers

· Stamp a matching size daisy flower on a scrap of white cardstock and color with Copic markers

· Use daisy die cuts with die cut machine to cut out colored daisy and apply to center of stamped image with a zot

· Mat the stamped image on the pink diamond cardstock (4”x 2¼”)

· Attach the matted stamped image to the card base

· Add bow (light pink and hot pink ribbon, small pearls by the yard) to ribbon

· Stamp the You are the Flower in my Garden sentiment and a small daisy on white cardstock (3¼”x 2”) with Tuxedo Black inkpad

· Color flower with Copic markers

· Mat the stamped image with pink diamond cardstock (4”x 2¼”)

· Mat pink print cardstock 1⅜”x 3½” to the pink diamond cardstock (1½”x 3⅝”) and attach to the inside of the card base

· Add the matted stamped sentiment to the matted print cardstock

· Add Art Glitter glue to center of flower on card front and apply Gala Glitz Mauvie

· Add Liquid Pearls petal pink to dots of stamped image on card front

Tuesday, March 29, 2011

Cool item for paper!!

Hi everyone! We are super excited about a new product that we just worked with! Over the weekend we worked with Heartfelt Creations at Memory Expo in Columbus. We did a ton of “make and take” cards for them (more than double their normal show) and demonstrated a new product that they are selling…called INKA GOLD. It is fast drying vibrant metal glass paint that comes in a jar as a paste. It is very easy to apply to various surfaces including paper, wood, polymer clay and more. It can be polished to bring out an even glossier shine. This stuff is wonderful on paper!!


Sunday, March 13, 2011

State Dance Championship 2011


This is a quick layout I did for my daughter's dance team competition from a few weeks ago. I wanted to be able to make something for her teachers to thank them for all the things that they do for the girls. We are so proud of all them and their hard work. Look for a new card post complete with instructions that will be posted tomorrow.


A Special Thank You!

We wanted to take a minute and thank everyone for the feedback and emails about our blog. We both love to be able to make special creations for our family and friends. We plan to make sure that we are sharing more of what we are working on and how we do it with everyone. So watch as we make more blog updates and we also plan to try to create how to tutorials and possibly video tutorials. I have been able to learn from so many people and would love the opportunity to share with others too. So keep and eye on our blog and see all the changes to come. Thanks again for all your support.

Todd and Lisa

Saturday, March 12, 2011

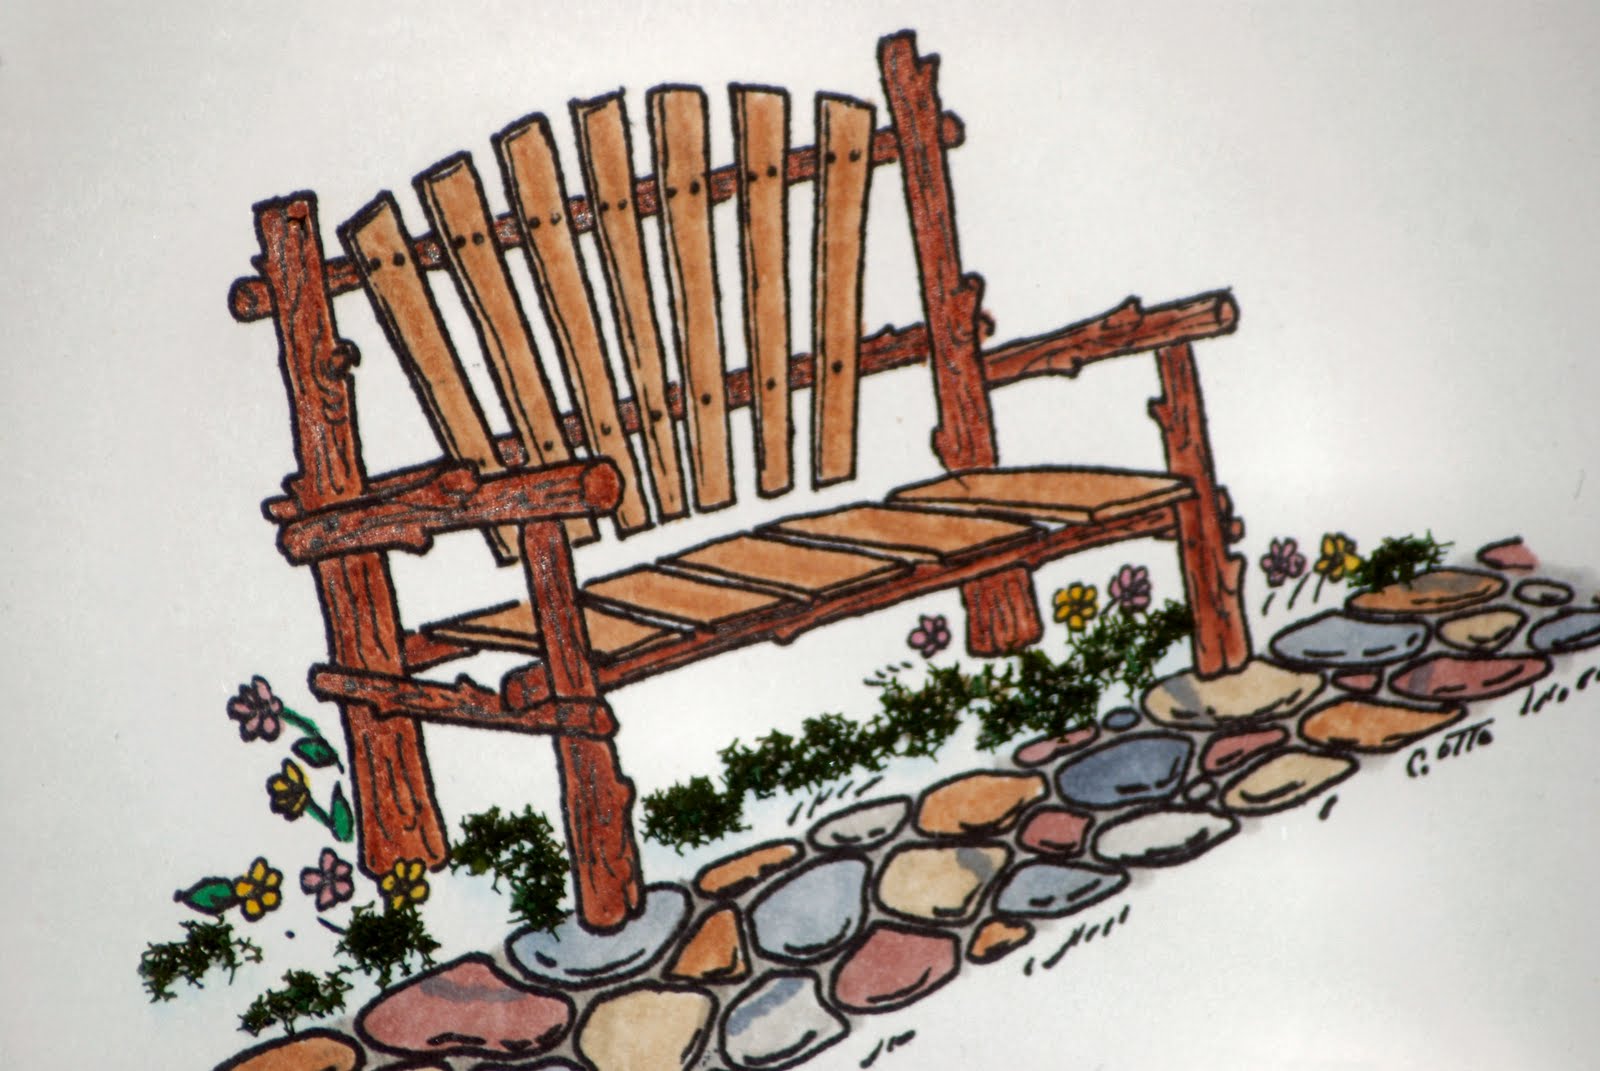
In the Garden


I am so glad that the weather is beginning to improve and signs of spring are starting to appear. Do not get me wrong I love to create for Christmas. But I am also so happy to see the flowers and the trees start to come back to life. It gives me a renewed energy to be creative. Here is one of our newest cards. Todd colored the stamped image with Copic Markers. I love how the colors and shadows look like real stones.

Would you like to make this card? Here is how to do it:

Materials Used:

Heartfelt Creations Stamp Rustic Garden Bench Product ID: 667G

White Cardstock 7 ⅞”x 10 ¾”, 5 ⅛”x 3 ⅝”

Green Cardstock 5 ½”x 4”, 7 ¾”x 5 ¼”

Green Print Paper 7 ½”x 5”

Memento Ink Pad Tuxedo Black

White Satin Ribbon ⅝” Wide

Copic Markers

Mini Cookie Cutter Embellishment –Heart

Art Glitter Glue (Heartfelt Creations Product ID: 159951

Flower Soft Christmas Green

Directions:

Score White Cardstock (7 ⅞”x 10 ¾”) at 5 ⅜ ”.

Layer Green Cardstock (7 ¾”x 5 ¼”) and Green Print Paper (7 ½”x 5”) and attach white ribbon and add to card base.

Stamp image on White Cardstock (5⅛”x 3⅝”) in Memento Ink Pad and color with Copic Markers.

Attach stamped image to Green Cardstock (5 ½”x 4”) and apply green flower soft with glue to grass area.

Add bow to ribbon and add heart embellishment to center of bow.